Magento 1 to 2 Migration


The End of life for Magento 1 was on June 30, 2020. It’s done! Magento 1 is no longer supported and a lot of merchants are freaked out. It is more than obvious that this didn’t happen overnight. The merchants were informed about Magento 1 EOL back in September 2018. However, there are a lot of business owners who are still pondering over the ‘How’ and ‘If’ of Magento 1 to 2 migration.

What happens if you stay on Magento 1?

Current Magento 1 users have two simple options; staying on Magento 1 or migrating to Magento 2. It goes without saying that Magento 2 is a better platform than Magento 1 but a lot of business owners are still using the abandoned version of Magento.

Ecommerce businesses that are still using the old version of Magento have to find ways to make their online store secure. End of life for Magento 1 literally means that the company will no longer provide the security patches that make your online store safe. You are at the mercy of third parties for the provision of the required security patches. Some merchants consider it a promising option but this cannot be the same as the official support.

Official support means that the company will provide a patch whenever an exploit is discovered. Third parties claim to do the same but you can’t ignore the fact that the demand and supply rule always governs the market. It is very likely that in near future, only a handful of merchants are still using Magento 1. This will drop the demand for Magento 1 related security patches and as a result the third-party providers will step back.

It is not that your business will collapse if you don’t migrate to another platform today. Your online store would still be live and if you happen to have made a deal with a trusted security provider, you are good to go for some time. However, it is not worth the risk to stay on Magento 1 forever.

 How is Magento 2 Better?

Official Support

Since we are past the End of Support deadline, the first and foremost thing to mention in this section is that unlike Magento 1, Magento 2 is a supported platform. As discussed earlier, an ecommerce platform that has official support is very secure but that’s not it! Magento will not only provide the security patches for Magento 2 from time to time but will also add in advanced features like PWA integration, code automation, advanced reporting and extended cache support.

Better Architecture

Magento 2 houses many new technologies that were not included in the previous version. It supports the newer versions of MySQL, CLI, Composer, Apache, Symfony, NGINX in addition to the default support of Memcached, Redis, and Varnish. Another important upgrade in the architecture of Magento is the minimized JavaScript that translates to a significant reduction in unnecessary browser operations.

Faster and Efficient

Customers hate it when the page they are trying to view is taking ages to load. Keeping this in mind, Magento 2 is so designed that the pages load no less than 30 to 50% faster as compared to Magento 1. Moreover, the stores built on Magento 2 are capable of handling as much as 39% more orders within 60 minutes as compared to Magento 1. This means that even with higher traffic, the pages will load faster so that no customer is left disappointed.

Why Aren’t People Migrating?

It seems that merchants are finding it hard to believe that the company has actually abandoned the 12-year-old Magento 1. Business owners are even claiming that it is very insensitive and cruel of them to cut off support for such a widely used ecommerce platform. However, the company has something to say in its defense.

The company released Magento 2 back in 2015 and announced that they will provide support for both; Magento 1 and 2 for a period of 36 months. The merchants had complete freedom to choose either Magento 1 or 2 to build their ecommerce store. Fast forward to three years, in September 2018, it was announced that the support for Magento 1 will cease on 30th June of the year 2020. Thus, the previously announced 36 months support window was extended to 55 months.

The users were informed almost 2 years before the cessation of support so that they have ample time to migrate to Magento 2 but a lot of merchants deliberately waited till the last moment. Many others have been trying to make all the necessary arrangements required to migrate to Magento 2 but are still not ready.

Is Migration Difficult?

Some people wrongfully considered Magento 2 an upgrade of the previous version but this is far from the truth. You might have noticed that the word ‘upgrade’ is nowhere to be seen when it comes to switching from Magento 1 to 2, the word ‘migration’ is used instead. This is simply because switching to Magento 2 is not a simple upgrade. It is just like migration. In simplest terms, you will have to carry all of your data and take it to a different platform. A lot of things will have to be designed again.

This migration will also affect your SEO setup. Once you migrate to Magento 2; the metadata templates, cross-links, and custom URL formats might get completely lost. This means that the entire SEO setup will have to be re-optimized. In order to get things back in place, you can take help from an SEO specialist.

Lastly, it must be mentioned that the process of migration is expensive. Many merchants are just not in the position to make such a big investment at the time.

Conclusion

Magento is one of the highly sought-after ecommerce platforms globally. This powerful Content Management System is running the online businesses of more than 250,000 merchants worldwide. It was smart of you to choose Magento in the first place.

Now that times have changed and the good old Magento is not good enough, the smart thing to do is to embrace the change and welcome a better, faster and more efficient platform for your ecommerce business.

Magento 2.4.2 Release! What is new

Introduction

Magento’s latest version 2.4.2 was released on 9th February 2021. Magento is popular for uplifting its merchants and store owners. For a better experience of shopping, users can upgrade to the Magento latest 2.4.2 version that is enriched with e-commerce opportunities. The main focus of this release is to improve not only the platform but enhance the performance and security of the platform. According to the release notes of Magento 2.4.2, 280 plus errors in the core program and 30 plus security enhancements have been encountered. Download Magento 2.2.2 and all necessary resources from its website.

Let’s have a quick eye on the key features of Magento 2.4.2:

Magento 2.4.2 release highpoints

Key Components included in Magento 2.4.2

  • Support included for:
    • Same site features for cookies.
    • Elastic search 9.x and Redis 6.x.
    • Using web-optimized images in the rest of the content.
  • Compatible with:
    • Composer 2.x
    • Varnish 6.4
  • Integrated with:
    • Adobe stock v2.1.1
  • Enhancement:
    • Enhanced with AMAZON S3 (AWS). Amazon’s simple storage service includes support for storing objects and media files. This support is added in all of the modules like B2B, page builder, and adobe stock integration.
    • Fixed 280 plus errors.

Security-only patch 2.4.0.12 for Magento 2.4.2

It’s an exclusive fix done based on vulnerabilities in prior version 2.4.1 of Magento. Now the merchants are allowed to efficiently install time-sensitive security fixes instead of applying fixes based on functionalities. Fixes that were applied in the prior version are contained in the latest version also.

Considerable security improvements

Around thirty-five fixes have been applied to cope with RCE (remote code execution) and XSS ( cross-site script) exposures. Furthermore, all the defilements related to CSP (core content security policy) have been encountered

Developments in infrastructure

Magento 2.4.2 includes noteworthy improvements in the frameworks of the following areas:

  • Import
  • Export
  • Client accounts
  • Content management system
  • Order management system
  • Catalog
  • Promotion
  • Targeting
  • Cart
  • Checkout
  • Staging
  • Preview

Efficient performance

  • Magento 2.4.2 contains fixes in core code to improve the application programming interface.
  • Improved response time for the administration to handle distributions having larger catalogs.
  • Includes graphQL updated features.
  • It now credits permissions for the catalog.
  • Supports localization across all stores.
  • Upgraded customer object for remote purchasing assistance.
  • Enabled with 20x greater and composite catalogs.

Includes PWA studio and its features are:

  • Internalization.
  • Localization.
  • Supports variant languages and currencies.
  • Supports numerous stores.
  • Supports reinforced extensibility.
  • New feature of “My Account” is released for Venia.
  • Google Lighthouse is used to improve customer’s perspective routine.

Updated features that can be controlled by admin:

  • Upload assets.
  • Edit details of assets.
  • Enclose media assets into the content.
  • Deletion of assets from media gallery.
  • Management of folder structure.

Exciting features and support for E-commerce

Magento’s 2.4.2 release introduced b2b v1.3.1. It also supports online payment gateways. Page builder CSS customization and migration of content are also supported.

Magento’s functional testing framework

MFTF 3.2.1 incorporates error tolerance in test and generation of test suit.  Furthermore, here is good news for all the Magento developers and merchants that additional substantial improvements and error fixes are done that are explained in the changelog of Magneto functional testing framework.

Bottom Line

All of the Magento users are recommended to hire professionals to upgrade their system for efficient performance. We have provided you all the highlights of the Magento 2.4.2 release but you are recommended to consult from official Magento open source 2.4.2 and Magento commerce 2.4.2 release notes as well. Stay tuned for more information about Magento’s upcoming releases.

Upgrade the latest Magento 2 version today! Explore the key features of Magento 2.4.2 until the release of Magento 2.4.3 in July 2021!

It is recommended to hire Certified Adobe Solution Partner and Developers for upgrading your Magento store.

Five Things to understand when choosing an Airbrush Compressor


The airbrush compressor is one of the essential items for airbrushing; unfortunately, it also happens to be one among the foremost expensive. When you’re new the hobby, it’s difficult to know what to seem for during a compressor, leading many novices to shop for an airbrush compressor that’s a poor fit. Before you buy a compressor for airbrush, take the time to read these five belongings you got to realize choosing a correct airbrush compressor. You can also check the airbrush compressor reviews.

1. What’s Auto-off Function and the way Important to possess It?

Even on a little airbrush compressor or a transportable airbrush compressor, noise is usually getting to be an element. While you’re can’t eliminate the noise of a compressor for airbrush altogether, you’ll mitigate that noise by buying a compressor with an auto-off function. When your compressor isn’t in use, i.e. when you are not spraying, the auto-off function will automatically shut it off. The auto-off feature helps reduce noise by the maximum amount of 75 percent, making for a more relaxing atmosphere. Unfortunately, compressors with the auto-off feature cost quite those without it; if you’re low on cash, confirm you’re buying a compressor with the essentials you would like before going for extra features like the auto-off function.

2. Is Power Important? What proportion Output Is Enough for Me?

The answer to the present question will vary from artist to artist, coming right down to a spread of things including what you’re using the compressor for, the airbrush type, and therefore the nozzle size. Generally, more power is usually better, but extra power can cause extra weight so keep that in mind.

If you are looking for a mini airbrush compressor for small jobs like painting nails, 10 LPM is quite sufficient. For larger jobs, like modeling, motorcycles, or body-art, you’ll want to seem into a minimum of 20 LPM. For jobs bigger as a car or truck where you’d wish to use a bigger nozzle for background, you are going to require traveling with a compressor that features a rating of 30 LPM or more.

3. Would I want a Moisture Trap?

Whether you are a novice or an expert, a moisture trap may be a non-essential item for any compressor for airbrush but remains helpful.

As the name implies, a moisture trap may be a device that reduces moisture by a big amount, resulting in fewer paint layer defects. A moisture trap will collect all of the water from a session into a receptacle, ensuring that the water won’t mix with the air. However, confine the mind that you’re going to got to drain the trap regularly. If your compressor doesn’t have a moisture trap, you’ll purchase one separately and install it right onto your airbrush.

4. Would I want a Compressor with Tank and why?

The decision over whether to get an airbrush compressor with tank or without a tank comes right down to your budget and therefore the specific job you’ve got in mind. There are currently three different options on the market, each with their pros and cons.

A compressor with no tank is that the cheapest option and can work continuously while your airbrush is in use. Unfortunately, compressors with no tank are susceptible to pulsation, which may cause defects in your project. However, you’ll decrease the quantity of pulsation by employing a coiled airline in conjunction with the thankless compressor.

Like a compressor with no tank, a compressor with a little tank, like Sparkman AC27, will work continuously. However, unlike the compressor with no tank, a little tank will eliminate most of the air pulsation going from the compressor’s piston to your airbrush. The bulk of sunshine tanks are roughly 0.3 liters, adding only a little amount of weight to your compressor.

For artists who are looking to figure on large, time-consuming pieces in peace and quiet, choose the compressor with the massive tank. These tanks are typically two or more liters, have zero pulsation, and can close up once you reach max pressure, albeit the airbrush remains in use. The massive tank also has the additional advantage of reducing the quantity of moisture that the airbrush is outputting.

5. Would I want pressure gage and Regulator on My Compressor?

For novices, having a pressure gage on your compressor may be a necessity. While expert artists can judge the quantity of pressure just by the variations in the color beginning of the airbrush, novices won’t have the talents necessary to gauge pressure accurately by sight. Not only are you ready to tell exactly what proportion pressure you’re using with a gauge but it also helps to allow you to know that your compressor is functioning properly. If you’re just starting out, every compressor you purchase, including transportable airbrush compressors, should have a pressure gage alternatively you will not be painting to the simplest of your ability.

The regulator is additionally self-explanatory; briefly, a regulator helps regulate the quantity of pressure sent to the airbrush. For jobs that need a particular level of adjustment, controlling the quantity of pressure will ensure you’re using just the proper amount. Small air regulators also available for installation directly on airbrush inlet.

For more, visit us: https://airbrushcompressorreviews.net

Bed Bug Heat Treatment


We get a lot of customers and people in general asking us, why we dont  offer heat treatments?  So, sometimes people hang up the phone, when we tell them we don’t offer heat treatments and most customers tell us,  the internet says it’s the only way to kill bed bugs. We usually ” sigh ” and then explain to them why that’s not true.

When referring to Bed Bug Heat Treatment we need to be clear. We don’t offer heat treatment when it comes to bringing large gas or electric powered heaters near or in your home. Bring the temperature up to between 122° to 140°.

Now that’s out of the way, here’s the reasons why we don’t use or recommend  bed bug heat treatment.

First of all we found out that heat treatment doesn’t  work in all situations. This application is great for if you have a home or downstairs apartment but in our line of work we have found that bed bugs can be found in all kinds of places like cars, RVs and even in the back of semi trucks. And heat treatments get kind of complicated when you have to lug equipment upstairs or can’t even get large weight equipment in a small or old building .

Second, the liability of heat treatments, what if something goes wrong? Now,  every pest control company will tell you how successful their heat treatments are but they will never tell you the failures or the damage that a heat treatment can possibly cause. When I say failure I don’t mean that it didn’t work  I mean that you killed all the bedbugs, but yet your TV or laptop is now ruined or even in some cases where the house has caught on fire but they were able to put it out before anything got out of control. This is a problem we’d rather not have to deal with.

And third of all, how dependable is a heat treatment. Every company that offers heat treatment  also does a chemical treatment after the heat treatment is done. Most companies offer a chemical treatment after the heat treatment is done because a factor they like to call ” just in case ” (lol) . Don’t get me wrong heat definitely can kill bed bugs but heating your home to 122 degrees will kill all kinds of bugs. Also heat cannot penetrate through structures or inside wall void etc.  Bed bugs don’t just hide in bed they can possibly hide in wall voids, behind baseboards inside dressers etc. Moving a mattress around a few times while in 122° Will definitely bed bugs and their eggs  but what happens if a bed bugs laid eggs inside a wall void after the heat has been applied Well a couple days or weeks later you could possibly have another bed bug infestation. This is why a chemical treatment is sometimes applied after heat treatment.

So, if that chemical treatment is able to kill bed bugs and their eggs days or weeks later, why is it not strong enough to kill on the first application or the only application?  Well it is strong enough! Furthermore Tulsa bed bugs Specialists have been studying the biology and chemistry and behavior of bed bugs for years to come up with a method that is 100% effective and safe on killing bed bugs in any type of situation.

In addition to this article we added some myths and facts about bed bugs and treatment options..

Myth:  Pesticides are harmful and are considered poisonous for humans as well animals.

Fact:   Many insecticides and pesticides have been made safer over the years and decades and when applied by a licensed experienced applicator, products have minimal risk if any to kids the elderly and pets.

Myth: Heat treatment is natural.

Fact:  Heat treatment uses natural gas. Natural gas comes with a lot of chemical additives.  These chemicals are added during the process of extracting  and developing the gas.This gas is definitely harmful to nature, and in the long run, potentially harmful for your home. But maybe electric heaters use electricity which is renewable energy?

Myth:  Heat treatments are safer than insecticides.

Fact:   If you remove the possibilities of your house catching on fire or melting your electronics (which we have seen with our own eyes) in addition to causing damage to your home or business structure then sure heat treatment or safer. Over the last few decades manufacturers and Entomology have worked to make insecticide more safer and effective in killing bed bugs.

Myth:  Heat treatment takes only one visit when pesticide treatments take several.

Fact:   While pesticide applications can take more than one application, usually heat treatments require follow-ups. Most companies use a residual pesticide after they conduct the heat treatment so that they don’t have to go back or just in case the heat treatment is not effective.

We ourselves have come behind a lot of heat treatment companies and provided service because of failure.

Myth:  Heat treatment is less expensive.

Fact:   Heat treatment requires very expensive equipment to be used over multiple days. Because of this it usually comes with a large price tag.

Myth:  Insecticide treatment doesn’t kill all stages of bed bugs.

Fact:  Of course our insecticide kills at all life stages of the bed bug.  Over the past 25 years the bed bug epidemic has become worse. Manufacturers have done their best to make solutions and insecticides more effective on killing bed bugs of all life cycle stages.

Myth:  Heat treatment is more effective.

Fact:   So remember when your being sold on the bed bug heat treatment? Think of the cost and ask yourself why it is so much? A potential reason is that because the heat-treatment equipment used. Since the equipment can cost upwards of $30,000, the pest control firms may pass that cost on to their customers.

For more, visit us: https://tulsabedbugexterminator.com/uncategorized/why-dont-we-offer-bed-bug-heat-treatment

Matcha Tea – Preparation, Health Benefits, Usage, and Side Effects

If you have seen any Japanese anime or visited a cafe lately, you must have seen a frothy green drink being served, that drink is nothing but Matcha Tea. A variant of the traditional tea – Matcha Tea never fails to delight the taste buds with its exquisite taste. Matcha green tea powder is so popular that it is not limited to the boundaries of a teacup anymore. From ice cream to baked products, Matcha green tea has gained a strong foothold in everyone’s heart. So what’s the secret behind this popularity? Keep reading, and we’ll tell you everything you need to know about Matcha Tea.

What is Matcha Green Tea?

Mostly popular in Japan, Matcha tea has broken all geographical barriers. Though Matcha Tea comes from the same plant Camellia Sinensis, it is different from the other variants. The reason behind this difference is the process of its production.

Matcha tea is a type of Green Tea produced by following a specific set of procedures. It’s shaded before the harvest by shading the shrubs from sunlight. As a result, the growth rate becomes slower, and the level of chlorophyll in the leaves increase. This is the reason why Matcha has a darker green colour than regular green tea. For Matcha Tea, only the smaller and top buds are hand-plucked instead of the whole plant. The plucked leaves are left to dry and after that deveined and destemmed. Then, it’s slowly grounded with stone to ensure the leaves don’t lose its aroma due to the fiction produced from the grinding. The result is a talcum like powder of emerald green colour. This is why Matcha Green Tea is so exquisite.

Going forward, the Matcha powder is packed in tight containers to avoid any kind of oxidation, resulting in the colour’s browning. Not only is the exquisite Matcha Tea prepared differently, but the method of its consumption is also different. Unlike other teas, where the tea leaves are steeped while brewing, the Matcha green tea powder is directly mixed with the water or milk. Many also like to whisk the tea in a zig-zag motion with a bamboo whisk. The result is a frothy green drink.

History of Matcha Green Tea

The name of Matcha tea comes from two words: the Japanese word ‘Ma’ meaning ground or rubbed and ‘cha’ meaning tea. The Chinese Zen monks have been drinking Matcha tea for over 900 years.
Gradually, it reached the Japanese mainlands in the 11th century and has been a significant part of their culture ever since. The traditional way of preparing Matcha green tea Powder requires various customary tools. It a slow step-by-step process and regarded as a meditative ritual. Due to the increasing trend of an organic lifestyle, Matcha Green Tea has regained its popularity in China and other parts of the world.

Buy Tea online on Teacurry.com

Is drinking Matcha Green Tea Good for you? 
What are the Health Benefits of Matcha Tea Powder?

Yes, drinking Matcha Tea regularly is a very healthy practice. As the leaves are harvested by shedding the leaves, the nutrients’ content is higher than other types of tea. Also, unlike other tea, where the leaves are discarded after brewing, in Matcha tea, the whole leaves are consumed in the form of Matcha green tea Powder. Thus, we get the benefits in a fuller way. Also, it doesn’t lose any nutrients during the preparation as it is grounded into Matcha green tea powder instead of being processed by machines.

Here are some other health benefits of the Matcha powder:

  • Matcha tea has a high amount of Epigallocatechin gallate. It is a kind of antioxidant that prevents diseases like cancer.
  • It helps in weight loss.
  • Matcha green tea Powder reduces the risk of Type-2 diabetes.
  • Studies claim Matcha green tea Powder helps in reducing LDL cholesterol and blood pressure.
  • Drinking Matcha Tea reduces anxiety and dementia.
  • Matcha tea considerably controls liver damage.
  • It helps improve concentration and memory
  • Matcha tea has more caffeine than other teas, so it improves the body’s energy level. Also, the presence of L-Theanine reduces the ill effects of caffeine.
  • It prevents the body from cardiovascular diseases.
  • In terms of nutritional value, a cup of Matcha Tea is equivalent to 10 cups of regular green tea.


When Should I Drink Matcha Green Tea?

Though it’s subjective, there are a few particular moments when You can drink Matcha tea to reap maximum benefits. They are –

  • Before exercising.
  • Before starting to work.
  • During the afternoon break.

Also, we would suggest you avoid Matcha Tea:

  • Early in the morning.
  • On an empty stomach.
  • Before sleep.

How Much Matcha Green Tea Should I Drink Every Day?

Anything should be done in moderation no matter how good it is. Though, you can have up to 5 cups of Matcha Tea in a single day. It is recommended not to have more 1 to 2 cups in a single day. 1 – 2 cups are enough to enrich your body with all the nutrients.

How to Prepare Matcha Green Tea?

Matcha green tea can be prepared both in a teacup or a tea bowl using the Matcha Green Tea Powder. Let us look at the steps for each of the recipes.

Matcha tea in a teacup –

  • Step 1: Put the water to boil. Use filtered water for better taste.
  • Step 2: Put some Matcha green tea Powder in the cup and pour a few drops of water.
  • Step 3: Mix the Matcha powder until it becomes a paste.
  • Step 4: Add more water to the paste and stir nicely.
  • Step 5: The Matcha Tea is ready to serve.

Matcha Tea in a Tea Bowl –

  • Step 1: Using a sifter, sift some Matcha Green Tea Powder into the bowl.
  • Step 2: Add the boiled water into it.
  • Step 3: Use a whisker to whisk it vigorously. Traditionally, bamboo whiskers are used to prepare it.
  • Step 4: After the drink becomes frothy, it is ready to serve. You can use Teacurry matcha green tea for both the recipes.

Does Matcha Green Tea Help in Weight Loss?

Matcha Tea has magical effects on weight loss programs. It’s because –

  • The EGCG catechin present in the Matcha Tea is a fat blocker. As a result, it increases the metabolism rate and reduces the growth of fatty cells in the body.
  • The caffeine content in the best Matcha tea is more than all other types. This helps in reducing the Body Mass Index or B.M.I. and body weight.
  • Both these points have been proved by two studies published in The American Journal of Clinical Nutrition.

What are the Side Effects of Matcha Green Tea?

Though the best Matcha tea is regarded to be a natural wonder for its health benefits, it is best to maintain moderation and avoid complicacy that may arise due to overconsumption. Here are some of the possible side effects of Matcha Green Tea –

  • Matcha tea can cause stomach problems like indigestion and diarrhoea.
  • It may lead to allergies in pregnant women.
  • As it contains an increased amount of caffeine, it may cause sleep-related problems like insomnia.
  • Having too much of Matcha Tea may cause heartburn and dehydration.

These side effects may vary from person to person. Also, they can be avoided with moderate usage of Matcha tea. Judging by its popularity and surging popularity as a healthy organic drink, Matcha tea can be termed as a gem of a drink. It is a better choice than coffee because of the presence of theanine. And thus, it can be a good alternative for people who don’t prefer coffee. Matcha Tea is also more nutritious than coffee and other forms of tea.

How to Capture The Perfect Sunset Shot?

How to Capture The Perfect Sunset Shot? Sunset Photography Camera

Settings.

Although the title describes cameras settings for sunset. One can use these settings also for a sunrise.

Photographers around the world have always been fascinated by the beauty of sunsets/sunrises.

The golden light bathing the landscape inspires them to capture the moment and make it even more satisfying.
In this post, we are going to help you take your sunset photography to
another level and make your shots more immersive and realistic than ever. We have shared some of the most important camera settings that you should emulate for capturing beautiful sunset shots.
So, let’s cut to the chase and get started!.
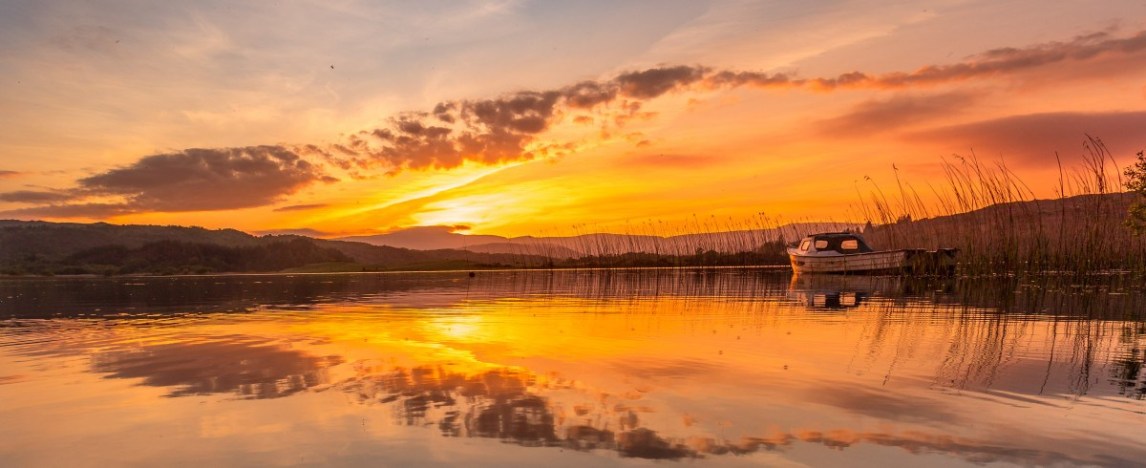
24×8
4 images combined together for one sunset pano
General Camera Settings for The Perfect Sunset Shot.

Here are the general camera settings that you should use while capturing shots during sunset.
Let’s talk about them in detail. First like any good photographer. Plan ahead, choose your location. There are hundreds of free apps out there that will show you the sun’s path during the day. Use all the tools to your advantage. I will list a few here that have helped me to scout locations. Track the path of the sun, and know where and when I should be there.
Always aim to be standing on your location 1 hour before that sun is due to set.

Be there with plenty of time to set up.
Look around, choose your foreground element. What the best advantage point is. Scout out the place for a few mins before you land on a spot that works best for you.

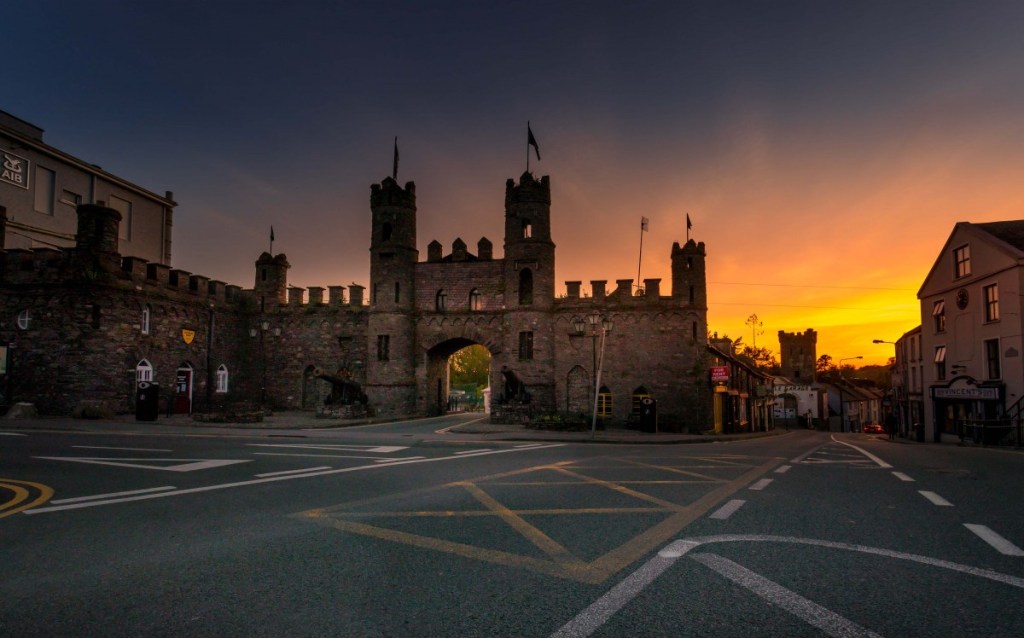
Sunset at the castle tower

Castle tower

The best app I use and have found to have everything is PhotoPills, This app is amazing. And it allows you to do so much. From shooting sunsets to sunrises. No matter the type of photography you love: Landscape, Milky Way, Moon, Sunrise, Sunset, Architecture, Star Trails, Drone, Meteor Showers, Solar eclipse, Lunar Eclipse, Time lapse, Wedding, Portrait or Travel. Click Here for their official website PhotoPills

and click HERE for their app on google playstore.

and on Apple Store click HERE

It cost 10.99 and in my opinion the greatest app developed for photographers out there. 10.99 is a steal for what this app can do.

TRIPOD.

Do you need a tripod? Yes. Why? Because you need to eliminate any and all shake. You need to be steady. Rock steady. Look you can steady the camera on a wall, on your car, anything. And shoot. But get into the idea of using a tripod. When you bring that shutter speed down way down. Holding the camera without camera shake is near impossible, starting off. Let’s say you are near water.

And that sun is coming down. When it comes down it comes down fast. You want to slow down the shutter. Turn the water to ice and have the perfect sunset in the background. You need to slow that shutter down so much. Holding the camera steady is impossible. You need a tripod. Getting into using a tripod will also help you out.

How?

It will slow you down to think. Choose a composition that works. Let you use the screen at the back of the camera. And in doing so, Make you think about your shot as you see it in real-time.

You don’t need a 300 or 600 tripod for this. Starting off, all you need is something to hold the camera steady. You can pick one up for very little money.

Lens.

A kit lens will work perfectly for landscape photography and will also work for sunset/sunrise. Canons 18-55 f3.5 is a cheap lens but will work fine. So will the Nikon 18-55 f3.5. Any wide-angle lens will work. As long as it is wide enough to capture a huge part of the landscape. But even a cheap kit lens like the zoom Canon 18-200 f3.5 will work. Having a zoom lens will also allow you to zoom in. And compose shots that wider angle lens cannot get. Selecting parts of the landscape and composing for a different selection of what you are seeing.

Mode.

Truth is you can shoot sunset/sunrises in different modes. But let’s focus on the fact that you are starting off. So switch your camera over to Aperture Priority mode. But I want you to do is take a keen note while in this mode. As we go through the settings and you dial them in. Watch what happens to your shutter speed. The ISO. The aperture. WHY?.

Because you are going to use these settings. Flip it over to manual mode also. Key in the settings and understand the settings while shooting in full manual mode also.

The key here is that in AV mode, the camera will work out the shutter speed for you. But it is as simple as keying in your settings and looking at the triangle of settings after you keyed them in. And translating that to the manual mode. So if you see in Av mode, ISO is at 100, Shutter speed is 1/50, and aperture is at f14, then take them three values and key them into the manual mode.

ISO as low as possible.

In a previous blog, I have gone over how to get out of auto and into using the creative modes of your camera. So I have written about what each setting does and the photography triangle. I have explained in great detail what is ISO. And why it is important.

So we won’t be going into that here. But I will link to it HERE. ISO as low as possible. ISO at 100. If you are fortunate enough to have a camera that goes down to ISO50, then ISO50 is your starting point. The lower the ISO the less noise in the image. You will be shooting at a few stages of the sunset.

One with an amazing bright sky as that sun is travelling down. One as it goes below the horizon and now the light fades. And when the sun drops below the horizon and lights up the sky. You are now shooting in a very low light situation. Trying to keep your ISO as low as possible will require the tripod.

1. Aperture

Start with putting your camera to Aperture mode. This can be done by turning your camera settings dial to ‘ A’ or ‘ Av’ mode. Once you do that, you will be able to manipulate the aperture settings of your camera. The aperture number should be kept high to get a large depth of field. Keep the aperture between f/11 and f/16. While the sun is still in the sky and hasn’t gone down below the horizon yet. Maybe you want to shoot an image with the sun streaking out across the landscape. The spikes of the sun stretching out touching the foreground. Between f14 and f20 works best for this.

So above what have you learned so far? 

Tripod
AV mode
low ISO
The aperture between f11 and f16
When you have them dialled in the camera while in AV mode will choose the shutter speed.

White Balance.

Your camera is most likely selecting the auto white balance for you. This is fine starting. Most cameras do a fine job of this. And if not it is simple to change in post. In Lightroom is one click and you can select whatever white balance you want. There are several white balances to choose from. But for starting, leave it in the auto white balance selection. As you progress, you can simply go into the menu section and choose whatever the white balance it is that you are shooting in. Maybe it is seriously cloudy, then select cloudy. White balance (WB) is the process of removing unrealistic colour casts so that objects which appear white in person are rendered white in your photo.

white balance selections below.

Auto white balance. 

It allows the camera to automatically select the white balance for you. Gives the camera control over the white balance. Truth is most cameras do a fine job of this. But a lot of cheaper cameras out there can and will tone this selection slightly off. But starting it is fine to use.

Daylight/Sunny

Adds a warmer tone to the image. If you find that when looking at your image at the back of the screen is slightly blue. Choose this white balance it will warm it up just a bit for you.

Cloudy.

Choosing this setting will warm the image up considerably more than the daylight/sunny setting. Cloudy white balance removes the blue and adds a warm yellow to your image.

Shade. 

The key is really in the names here guys. Cloudy and Shade. In these conditions, the images appear blueish. By choosing these settings you are increasing more warmth into your image. The shade will add more than cloudy and a lot more than daylight/sunny.

Flash.

Because light from a flash tends to be on the cool or bluish side, the flash white balance setting warms up the light in your photos.

Fluorescent

When shooting under fluorescent lighting, this setting will warm up your images.

Tungsten 

Tungsten light or incandescent light is quiet warm to start with. If you choose this setting it will cool down your images and try and balance the blue with the warmth.

You also have Kelvin,

Kelvin.
This setting allows you to dial in your white balance. ranging from very cool to very warm. Depending on your camera. This setting can range from 1700K. Where the K stands for Kelvin up to 10000k.

On the lower side, the images are very warm. On the higher side, the images are very cold or very blue. The kelvin settings allow you to choose what the conditions of lighting are within the situation you find yourself shooting in.

Focus.

Where to Focus? while turning your lens dial to focus. We are not trying to be world-class here. And find a spot within the landscape to focus on and start shooting. What we are doing in this blog. Is to set you up and come away with a great landscape image. In doing so we are going to presume we are capturing the whole landscape.

As wide as the lens will allow us. So using any of the kit lenses mentioned above. Down by the 18 number on the lens you will find the symbol for infinity.

B At Infinity Focus Line
I have attached two images to show you what the symbol looks like. Move the dial to this symbol. You will see everything in the landscape is in focus. Leave it there. Now the foreground may appear to be dark. Maybe too dark.

Don’t worry so much. Remember you are in Av mode. And by turning the wheel just by the shutter button. This wheel will allow you to add and take away stops of light to your image. So by moving this wheel left to right you will increase the light in your image. Brightening up the foreground and the darker areas in your image. Moving it from right to left, will decrease the amount of light in your image.

Infinity on the side of len
Infinity symbol located the number 18
The Key Here
The key here is simple to remember. We will never walk away with a finished image without some processing in whatever software you use. The key is to find a balance in the exposure that you can see some detail in the foreground while not completely blowing out the sky.

Tricky part about shooting a sunset/sunrise
You are never going to take a sunset images and look at the back of the screen and hey presto it is perfect. You have to remember that you are shooting against a sky that is at the start so bright. All the highlights are blown out and all the foreground is dark. And that could discourage you.

dont let it. It is indeed what is going to happen for us all.

The key is to find a medium within your exposure for sunset photography. One not to have a seriously blown out sky. And two not to have a foreground so dark, that when you process the image you cant recover the foreground. I will attach a sunset here I shot, What it looks like straight in-camera, and what it looks like once edited.


Look at the images I have attached. You can just about see some foreground detail in the image I took while out. And in processing the image I was able to bring back that foreground by using the presets I have created. while taking the image I zoomed into the foreground. If I was able to see some detail I knew in processing the image I could bring back a lot more.

I adjusted the wheel to allow me just about see the detail. While also not blowing out the sky.

Look sometimes you will blow out that sky.
So is the nature of sunset photography. Sometimes the foreground will remain dark when you process the image. We are human, we make mistakes and forget to adjust to compensate for what we are shooting.

I have created a set of presets that I have linked to my youtube channel that shows you how to use the presets. And how to adjust the sliders in lightroom to reduce the colours and get the balance in your image. I will link to that video HERE. Download the presets. Install them and with the click of a button. The preset will process your image quickly. All you need to do is watch the video and move the sliders I show you how to move in the video. To adjust your image you have taken.

So we have chosen to shoot in Av mode. Selected or F-stop of between f11 and f16. We are resting on a tripod. And or ISO is at ISO100. The last setting I would have you change is the timing of the shot. Meaning the interval count down before the shot is taking. Cameras will allow you a 10-second count down and a 2-second count down. In the menu, you will find this in the shooting mode.

This is a self-timer count down. That allows you to press the shutter button and walk away from the camera. Reducing any touching before the image is taken. Compose your shot. Look at the screen at the back. Zoom into the foreground and see if you can see some detail. If not move the wheel near the shutter button to the right.

 It will increase the light.

You will start to see the foreground. You don’t want the foreground well lit. Doing so will blow the whole sky out. And you won’t be able to recover it. Aim for just about able to see foreground detail. Your sky will look blown out. Don’t worry. It always does. When you are trying to retain the foreground it is a balancing act with the exposure. Just able to see foreground detail aim for that. Take your shot.

Remember in processing in lightroom you can move the shadow slider and bring the foreground back. And move the highlight slider to bring the sky down. Or use my presets and click them and it will edit the image for you. Watch my video on youtube and learn how to adjust the colours to show you how to get the image you have taken.

Things to remember.
You can play around in AV mode like I said above. And move the control wheel near the shutter button. Move it always down to the right and watch the sky darken down and the foreground go black. Doing so will give you that dark orange sunset look. And in some cases depending on how far down you move that wheel. Silhouette the mountains or the objects in the foreground.

If using a zoom lens. Don’t be afraid to zoom in and select parts of the landscape. Doing so will compress the background and bring it forward. It will give you a different style of image. As you get used to the settings. A style will emerge.

The beauty of photography is,
we are all not alike. You will see something I won’t. You will process an image completely different to what I will. Photographers around the world are so different in how they perceive the landscape. No two landscapes will be the same, shot by two different photographers.

Don’t try and be like everyone else. Find your angle and style and work on it. It would be a sad world if we all took images similar alike. Experiment, try new things, use the above settings to get you rolling.

But most of all have fun. Half the beauty of taking a sunset pic isn’t the image at all. Half the beauty is been out and about and enjoying it. If you capture it and edit it and are happy with it then that is all matters. Work on that image and how to do it better the next time.

And when that sun goes down the real party starts in the sky.
All the colours appear and the sky darkens but also lights up with several colours.

Important to understand during a sunset or sunrise. The image you want may not be facing the sun. Always look around you, even behind you. Some of the best images I have taken during sunset or sunrise.Was indeed not facing the sun at all. That’s why you get there early. scout it out. Look around. Look behind you. Have options.

Sunset Photography

I have found that if there are clouds high in the sky during sunset. Then the sky will produce a show. Scattered clouds that is. Not a sky full of clouds. A sky full of clouds will lead to a disaster at sunset. but scatter clouds around and high up.

As that sun is going down it is projecting the light to bounce off the clouds who by now are acting like prisms. And when the sun goes below the horizon. It shoots that light back up and across the scatter clouds and stretches for miles around you. That’s why sometimes looking behind you that colour has stretched so far it is now lighting up the sky right around you. And if lucky you can pull a few different images out of one location.
For more, Visit us: https://jodphotography.ie/blog-post/sunset-photography-guide

Samsung Galaxy S20 – A leap forward

Last year Samsung launched the Galaxy S10 Series, which boasted greater speed, screen-to-body ratio and a punch-hole style notch which was adopted into the widely praised Note10 Series. After the overwhelmingly well received Samsung Galaxy S10 Series, Samsung could have gone the easy route, just upscaled everything and called it an update. But that wouldn’t count as innovation. They chose to focus on improving certain features, made bold decisions and took a leap forward with more than just model number from S10 to the Samsung Galaxy S20.

Firstly, the most noticeable feature of the Samsung Galaxy S20 would be the triple camera setup in the back. Equipped with a 12 MP, 64 MP and 12 MP Camera Setup, the Galaxy S20 uses greater physical sensors and is capable of a 3x Hardware Zoom. Coupled with the 10x Software Zoom, the Samsung Galaxy S20 shows off a 30x Hybrid Zoom (which is a far cry from the Galaxy S20 Ultra’s zoom capability, but more on that later). The camera setup can record videos at 8k resolution, that also allows for 30MP snapshots to be taken while shooting an 8k video. While the hardware has been “upscaled” quite a bit, the software brings in the cleverness in the use of that hardware. This brings us to ‘Single Take’, a software enhancement that helps take multiple formats when shooting people/things in motion. All it takes is one tap of the Shutter Button, which gives a haptic feedback mimicking a real DSLR Shutter Button, and then the phone starts taking filtered and unfiltered videos that are sped up, reversed, apt for boomerangs, also filtered and unfiltered images that are timed perfectly for capturing the best moments. This reduces a lot of the missed opportunities and blurred pictures that we are all too familiar with.

Now on to the screen of the Galaxy S20 that carries the visuals to a new level of reality. Samsung has reduced the bleeding edges of the infinity display which reduces the number of accidental touch inputs without removing the edge swipe gestures. With a size of 6.2”, the QHD OLED screen gives the truest colour reproduction and deepest blacks, ending up looking gorgeous and mesmerizing to look at. Samsung has increased the screen refresh rate to 120 Hz which is a trend that all other flagships will follow. This increase in the refresh rate, along with a leap in touch sensitivity sample rate of 240Hz, makes all the animations look smooth. Samsung also seems to have increased the speed of the opening, closing, scrolling and swiping animations in the One UI 2.0, that upon coupling with the refresh rate and touch sensitivity make the phone feel faster than any smartphone in the market today. Security has also been upped with the in-screen Ultrasonic fingerprint reader that has greater accuracy and speed in reading fingerprints.

The default 12GB RAM plus the latest Qualcomm Snapdragon 865 Processor lets the phone handle any task you throw at it. The Samsung Galaxy 20 can handle the latest RAM intensive games and apps with ease. This beastly increase in the RAM will let you pin up to 5 apps that will run all the time, thus reducing the lag from opening apps. Also, the 128GB with expandable storage let’s you carry a huge collection of songs, videos and apps.

With so many upgrades to the speed and power of the phone, Samsung had to increase the battery size to 4000mAh, which will easily get you through a full day of moderate usage. The glass back enables Wireless charging and the phone provides reverse wireless charging for wireless charging capable accessories like the Galaxy Buds+ and the Samsung Smartwatches.

Durability is another avenue for a step forward that Samsung has taken with the IP68 Ingress Protection on the Galaxy S20. This ensures that the Galaxy S20 can withstand dust, dirt, sand, and makes it resistant to submersion up to a maximum depth of 1.5m underwater for up to thirty minutes.
To top it all off, this phone is 5G capable to bring you the highest of internet speeds. This beast of a phone is just the youngest sibling in a line-up that is pushing the boundaries of every avenue that the Galaxy S20 has exceled in. Look no further, you can have the Samsung Galaxy S20 in the palm of your hand at a very low starting instalment.

Available now on www.JackysBrandShop.com

The New Era of Digital Marketing

The business marketing trends have changed from the orthodox advertisement methods to digitized marketing. Digital marketing is, one way or another, the basic requirement for every business today. Whether international or local, giant or small all need digital marketing to promote themselves. That said, the need for digital marketers is increasing rapidly. And obviously, the entrepreneurs look into paying out a hefty amount of salary just to get themselves promoted online. Well, you know it already or must have witnessed a relative or a friend earning a handsome amount of money just because of their digital marketing skills. Certainly, that might have convinced you to undergo a digital marketing course in Karachi. But should you know about the digital marketing course in Karachi besides a hefty income?

Here we have gathered some insight into the digital marketing training that you should know.

This is Actually Meant to Increase the Online Repute:

Very frankly, the genie of the digital marketing effects the online presence. The greater the online presence, the more customer get in. Well, do not string any high expectations in the beginning. If you are a businessman, then it is a way that could help you in increasing your outreach. You can increase the traffic towards your website. And can interact with more customers on social media. Further, if you are an individual, this can lead to a proficient career down the road. But do not expect anything big right after you have graduated the course.

It Will Stays For Long:

A lot of guys would suggest that taking a digital marketing course in Karachi is of no use. As the search engines are striving to kill this beat out. But that is not the truth. Actually, as long as there are businesses, digital marketing will grow. In the world of tomorrow, the tech would differ, but digital marketing would remain there. Certainly, it is a long term job and even you can make your younger siblings learn this trait.

Everyone is Not the Trainer:

It may look easier to watch the digital marketing tutorial or read about them on the internet. But if you are stuck at some point for which the internet information is not solving your trouble, then that will hinder your progress. Alongside everyone is not the trainer. Teaching from a book could be easy. But implementing that practically is hard. Certainly, those with practical experience have the ability to train you perfectly as they have the solution because they have practiced it. And they know the strategy for the actual process.

Hence, look into joining a computer institute that can train exactly as per market requirement. To name, institutes like ICT Academy have professional trainers and counselors that guide the student throughout the course.

For more, Visit us: https://www.ictacademy.pk/course-category/digital-marketing

GEOMASTER 3D WATER DETECTOR

We are happy to announce the release of our latest 3d underground water detector Geomaster. 3D Locators water detector 3DL 500 was one of the highest success water detector in the year 2018-2019. Considering the development in technologies 3D Locators has now released its unique invention Geomaster with 5 technologies in 1 system including geomagnetic locators, Long range locator, Geofrequency detector, live transmission technology and Very Low frequency earth resistance analyzer. We are proud to represent our system is the world’s first equipment with automatic mapping and reporting.

In 2019 when customers had a big hope on 3DL 500 with its three technologies system, we had arranged a Business meet where all our 3D Locators users were invited and based on their experiences and reviews our Research and development team decided to additionally in build a VLF detection system to check the conductance and resistance of the surface and subsurface to confirm the fault zone.

Mr.Karthik Srinivas Technical trainer for 3D Locators involved in case studies at various geological platforms which was further discussed by our analyst to release the latest GEOMASTER ground water detector. In electrical resistivity survey the current electrodes and potential electrodes were used as the medium to transmit and receive electric conductance and we had to calculate the resistance, In the Geomaster 3D water detector we use the Geofrequency survey to analyze the permeability of the subsurface and very low frequency survey to calculate the resistance in subsurface, where both technologies together is proving its highest accuracy on field.

3D Locators water detector products are designed based on customer requirement where we have the Model 1- Long range system, Model-2 Geofrequency system, Model-3 3DL 500 (3 in1 water detector) and Model-4 Geomaster (5 in1) 3D water detector.

We have our research and design team based in Italy, and we have established our new manufacturing unit at India for potential buyer satisfaction and to provide 100% service satisfaction to our customers.

Our trainers are well trained on various technologies and current Geological conditions, we are working on our upcoming projects including hydro fracturing for drilled water wells and injection well construction for borewell recharging via special filters.
We request our users and buyers to please check our training updates or attend our trainings to understand and estimate most of the geological features and to also understand how 3D Locators can provide success in borewell point identification.

For more, Visit Us: https://3dlocators.it

All you want to know about the used cars in the UAE

Are you Ready to sell your used car in the UAE? Then you are in luck! Today, you don’t have to look up individual buyers, rely on outdated estimation techniques and travel across cities to find a buyer for your used car. At wecashanycar we offer you a hassle free and convenient way to cash your car in UAE.

How big is the UAE used car market?

The used car market in UAE has been growing steadily in the last 5 years. The market size has seen a single-digit growth between 2015 and 2020 coupled with a boost in the value of pre-owned cars and a decrease in the average span of car ownership. As of the last quarter of 2019, the UAE used car market had grown to a whopping Dh11.2 billion making it superbly easy for a car owner like you to sell your car for cash in UAE.

What factors contribute to the rise in the number of used car buyers in the UAE?

After the sharp drop in oil prices affecting the global economy, there has been a decrease in the demand for new cars. It has resulted in the increase in the sales of second-hand cars in UAE. The previous 5 years have seen a steady growth of the pre-owned car market in both Dubai and Abu Dhabi.

Multiple market analyses have revealed that buyers are searching for used cars for sale in Dubai between four and ten times more frequently than brand new ones. These factors have made selling pre-owned cars for cash in the UAE to buyers like wecashanycar easy and seamless for all car owners

Which are the most sold used cars in the UAE?

Currently, Toyota Corolla (2015) is the most-bought car model at wecashanycar for cash due to its low maintenance cost and high fuel efficiency. The second most commonly bought pre-owned car brand is Nissan.
wecashanycar has served over 100,000 customers in 2019 and the total valuation of the cars inspected touched crossed AED 1 billion the same year.
Finding authentic buyers for your used car in Dubai, especially if its a used car, and you are in need of cash urgently, is no longer a hassle. You can easily avoid fraudulent parties by opting for us, which guarantees convenience, hassle free process to cash your used car.

Why are people holding onto their personal cars for longer periods in the UAE?

Finding used car buyers for cash in UAE has become significantly effortless since 2015, as the depreciation rate for pre-owned cars has slowed down considerably. People are not looking at the total ticket price of a new vehicle, but they are considering the affordability of the monthly rates, which they can pay more comfortably to an authorized dealer of used cars for sale in UAE.

It is indeed great news for the consumers since they can now enjoy higher sales value for their used cars. Doing business with us has made it possible for consumers in the UAE to get expert-guided inspection and the right valuation of their pre-loved cars in the current market.
wecashanycar is ready to give the best valuation from our experts, no matter what make or model of car you want to sell for instant cash!
For more, Visit Us: https://wecashanycar.com/en/home